Disclosure: This article contains Amazon affiliate links to products we recommend. If you click through and make a purchase through these links, we’ll get a small commission, but you won’t pay any extra. Thank you!
Every autumn, I get the knitting bug.
Knitting is just one of those rituals like hot mugs of tea, the reintroduction of oatmeal to the breakfast table, buying sweaters at the thrift store, and slathering all food products in cinnamon. (Shhh! Don’t tell anyone that I put cinnamon on their chicken!)
Knitting is an integral part of fall.
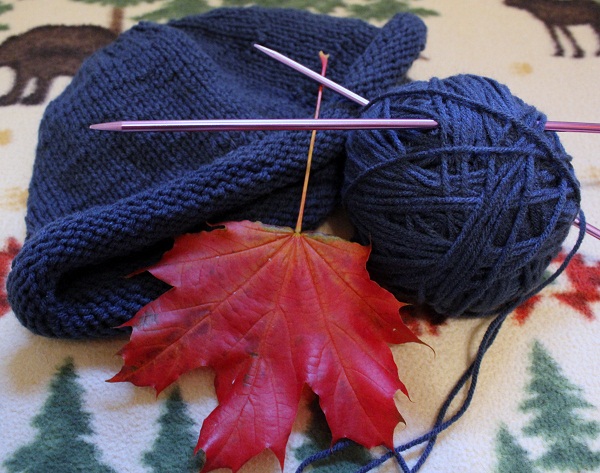
This year, I decided that it was high time that I knit a hat. Not wanting to go out and purchase double-sided needles or struggling with the Knifty Knitter, I decided to revisit my old Klutz knitting book that I’d received for my 6th birthday.
There, on page 83, were the instructions to make a cozy hat.
Yarn wound and needles poised, I double-checked my purling skills and began the hat. You wouldn’t believe how wonderful it is to have a knitting project.
There’s always a good reason to disappear to your room with a cup of coffee and knit away.
Within 2 weeks of on-and-off knitting, the project was complete.
The hat was incredibly easy to make aside from the fact that Klutz’s pattern is designed for people with giant heads. I tried to remedy that by sewing it tighter on the inside, which created a lumpy mess at the back of the hat.
Because of this, I’d recommend that any wearers of my hat always stand with their back in a corner. This will garner the most favorable remarks and prevent that “I thought your hat was cute until I saw the back. Sorry,” reaction.
In all seriousness, I’d recommend that you sew the hat with a little seam on the inside to fit your head instead of sewing together the outer edges unless you have an enormous cranium.
Here’s the pattern:
What you will need:
- Size 8 knitting needles
- 130 yards of worsted weight yarn
- A yarn needle
1. Cast on 84 stitches. Count them twice to ensure that you’ve got the right number. Knit the first row.
2. Purl the second row.
3. Continue to work in the stockinette stitch (knit one row, purl the next). After a few inches, the bottom edge will begin to roll up. This is exactly what’s supposed to happen.
4. Work until your piece measures 8 inches when unrolled. Finish on a purl row so that your next row will be a knit row.
5. Knit 5 stitches, and then knit 2 stitches together. Repeat across the row. You should finish the row with 72 stitches on your needle.
6. Purl the next row. It doesn’t hurt to check once again that you have 72 stitches.
7. Now knit 4 stitches then knit 2 together. Repeat across the row. You should now end the row with 60 stitches on your needle.
8. Purl the next row, again ensuring that you have 60 stitches on the needle.
9. Knit 3 stitches, and then knit 2 stitches together. Repeat across the row. At the end of this row you should have 48 stitches on your needle.
10. Purl the next row.
11. Knit 2 stitches, and then knit 2 stitches together. Repeat across row. At the end of this row, you should have 36 stitches.
12. Purl the next row.
13. Knit 1 stitch, and then knit 2 together. Repeat across the row. At the end of this row, you’ll have 24 stitches.
14. Purl the next row.
15. Finally, knit 2 stitches together across the entire row. At the end of this row, you should have 12 stitches remaining.
16. Cut the yarn so that the end is about a yard long and thread onto your yarn needle. Carefully transfer your stitches from the knitting needle onto your yarn needle.
17. Pull the yarn through the stitches, leaving a little loop on the right side, and then pull the yarn through the loop.
18. Gently pull the whole thing together.
19. With the right side of your hat facing inward, use the yarn on your yarn needle to sew the edges of the hat together. This is where you’ll want to make sure that the hat isn’t too big. If you sew the hat too loosely at this point, you’ll have to “fix” your work and the hat will look terrible.
20. Stop sewing at around where the roll begins, about an inch above the bottom of the hat.
21. Turn the hat right-side out and sew the last inch of the seam from the outside. When your hat rolls, this seam will disappear.
Tie off and weave in your ends.
Happy Knitting!


Knitting is a craft in which two needles along with thread or yarn are used to create fabric pieces or garments by creating loops in the yarn. Knitting can be used to create many types of fabric, from framed knitting artwork to sweaters, afghan quilts, throws, blankets, mittens, or even bedroom slippers.;:`;
http://caramoanpackage.comRemember to view our new blog page
Love the hat wish I could knit. I guess I’ll have to crochet one. I just made the grand babies each one.
Holly